
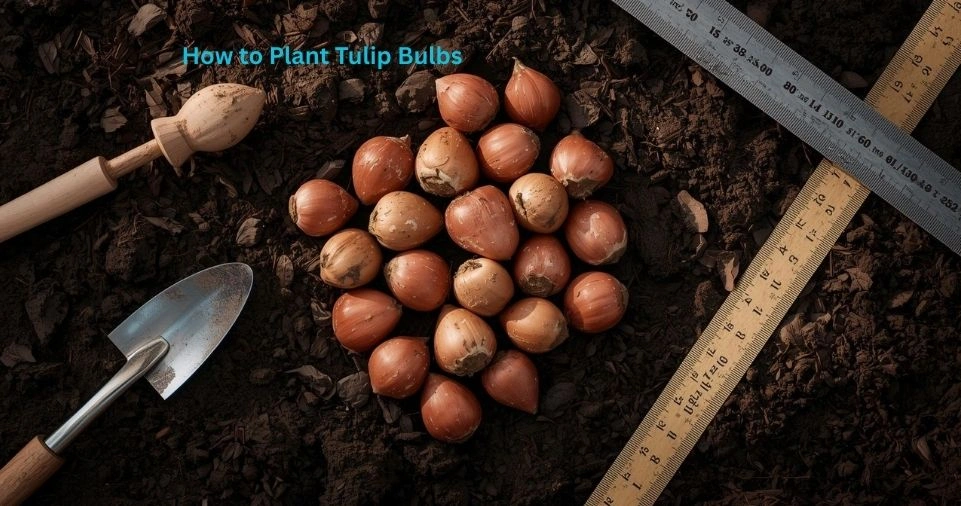
How to Plant Tulip Bulbs: Best Complete A-to-Z Guide 2026
If you have ever stood in a garden store in autumn, holding a bag of tulip bulbs and wondering exactly what to do with them — this guide How to Plant Tulip Bulbs was written for you. Tulip bulbs look deceptively simple: small, papery-skinned, onion-shaped objects that give very little hint of the spectacular flowers hiding inside. But plant them correctly — at the right depth, in the right soil, at the right time of year — and they will reward you with some of the most stunning blooms spring has to offer.
This comprehensive guide covers the complete story of tulip bulbs from the very beginning — their origins in the wild mountain regions of Central Asia, their journey through the Ottoman Empire and into European gardens in the 1500s, all the way to the modern gardening techniques used by professional flower farmers and home gardeners alike today.
You will learn when to plant (fall, when soil cools to 40–50°F), how deep to plant (6–8 inches, pointed end up), where to plant (full sun, well-draining soil), which variety to choose (from Darwin Hybrids to Parrot tulips and everything in between), how to grow them in pots and containers, how to water, feed, and protect them from pests, what to do after they finish blooming, and much more — everything organized into clear sections, comparison tables, step-by-step instructions, and a detailed FAQ so you have one single, reliable resource for all things tulip planting.
1. What Are Tulip Bulbs? (Definition & Meaning)
A tulip bulb is a compact, underground storage organ that contains everything a tulip plant needs to survive winter and bloom in spring. Technically classified as a true bulb, it consists of tightly packed, fleshy scale leaves surrounding an embryonic plant — including the roots, stem, leaves, and flower — all stored inside a single protective structure.
Unlike seeds, bulbs are genetically mature plants in a dormant state. This means when you plant tulip bulb in fall, you are not starting from scratch — you are waking up a fully formed plant that has been resting, waiting for the right conditions of cold followed by warmth to trigger its spectacular spring bloom.
Key Parts of a Tulip Bulb:
- Tunic (outer skin): The dry, papery brown covering that protects the bulb from drying out and physical damage
- Basal Plate: The flat bottom of the bulb where roots emerge — always faces downward when planting
- Fleshy Scales: Thick, nutrient-rich layers that feed the growing plant through winter and early spring
- Embryonic Shoot: The pointed tip at the top of the bulb, which becomes the stem, leaves, and flower — always faces upward
- Offset Bulblets: Small daughter bulbs that sometimes form around the mother bulb and can be separated to grow new plants
2. The History and Origin of Tulip Bulbs — Who Invented Tulip Cultivation?
Tulips are not native to the Netherlands, despite being closely associated with Dutch culture. The tulip originated in the mountainous regions of Central Asia — specifically in areas covering modern-day Kazakhstan, Kyrgyzstan, Afghanistan, Turkey, and parts of China — where they grew wild for thousands of years.
The Journey of the Tulip from East to West:
- Wild tulips were first cultivated by the Ottoman Turks as early as the 1000s CE. The Ottoman Empire prized the tulip as a sacred symbol of paradise.
- The word ‘tulip’ is believed to derive from the Turkish word ‘tulbend’ (turban), a reference to the flower’s shape when in bloom.
- Ogier Ghiselin de Busbecq, the Flemish diplomat and ambassador of the Holy Roman Emperor to the Ottoman court, is widely credited as the person who introduced tulip bulbs to Western Europe in the 1550s. He sent bulbs and seeds to botanist Carolus Clusius in Vienna around 1573.
- Carolus Clusius (Charles de l’Ecluse), a Flemish botanist, is recognized as the father of modern tulip cultivation in Europe. He brought tulip bulbs to Leiden, Netherlands in 1593, planting them in the university botanical garden — marking the birth of Dutch tulip horticulture.
- By the early 1600s, tulips had spread rapidly across the Netherlands, sparking ‘Tulip Mania’ (1634-1637), one of the first recorded economic bubbles in history. A single rare tulip bulb could sell for more than ten times a craftsman’s annual salary.
- Today, the Netherlands produces approximately 3 billion tulip bulbs annually, supplying about 80% of the world’s tulip bulbs. The Keukenhof Gardens in Lisse, Netherlands, is the world’s most famous tulip garden, displaying over 7 million bulbs each spring.
| Period | Key Event | Location | Significance |
| Pre-1000s CE | Wild tulips grow naturally | Central Asia | Origin of species |
| 1000s–1400s CE | Ottoman Turks cultivate tulips | Turkey / Persia | First cultivation |
| ~1554 | De Busbecq observes tulips | Istanbul, Ottoman Empire | Western world introduction |
| 1573 | Bulbs sent to Carolus Clusius | Vienna, Austria | Scientific documentation begins |
| 1593 | Clusius plants tulips in Leiden | Netherlands | European tulip cultivation born |
| 1634–1637 | Tulip Mania economic bubble | Netherlands | First commodity speculation crash |
| 1800s–present | Hybrid development begins | Netherlands / Global | Modern varieties created |
| Today | 3 billion bulbs produced annually | Netherlands | Global tulip industry |
3. Why Plant Tulip Bulbs? Benefits & Reasons
Tulip bulbs are among the most rewarding plants a gardener can grow. Here is why millions of gardeners around the world plant them every fall:
- Spectacular spring color: Tulips are one of the first bold, large flowers to appear in spring, transforming gardens after months of gray winter.
- Wide variety of colors and shapes: Available in virtually every color except true blue, including bi-colored and multi-petaled varieties.
- Easy for beginners: No special skills required — plant the bulb, wait, and watch it bloom.
- Excellent for cut flowers: Tulips are one of the most popular cut flowers globally, lasting 7-10 days in a vase when harvested correctly.
- Low cost, high reward: A single bag of bulbs planted in fall produces a stunning spring display for minimal investment.
- Pollinators love tulips: Tulips attract bees and other early-season pollinators when few other flowers are blooming.
- Container friendly: Perfect for patios, balconies, and small gardens — they grow beautifully in pots.
- Layering (Lasagna planting): Multiple bulb varieties can be layered in one container for a succession of blooms from early to late spring.
4. When to Plant Tulip Bulbs — The Best Planting Time by Zone
Timing is the single most important factor in successfully growing tulips. Tulip bulbs require a cold dormancy period (called vernalization) to trigger their blooming mechanism. Plant too early when soil is still warm and the bulbs may rot or sprout prematurely. Plant too late and they won’t have time to establish roots before the ground freezes hard.
The Golden Rule: Plant When Soil Temperature Drops to 40°F–50°F (4°C–10°C)
Check soil temperature 6 inches deep using a soil thermometer. Do not rely solely on air temperature — soil retains heat longer than air, especially after a warm summer.
| USDA Hardiness Zone | Typical Planting Window | Region Examples | Soil Temp Target |
| Zones 3–4 | Mid-September to early October | Northern Minnesota, Montana, Maine | Below 50°F (10°C) |
| Zone 5 | Late September to mid-October | Chicago IL, Columbus OH, Denver CO | Below 50°F (10°C) |
| Zone 6 | Mid-October to early November | Philadelphia PA, Kansas City MO | 45–50°F (7–10°C) |
| Zone 7 | Late October to mid-November | Washington DC, Nashville TN | 45–50°F (7–10°C) |
| Zone 8 | November to December | Dallas TX, Seattle WA, Atlanta GA | 40–45°F (4–7°C) |
| Zone 9–10 | December (pre-chilled bulbs only) | Los Angeles CA, Miami FL | Requires pre-chilling |
Pre-Chilling Tulip Bulbs for Warm Climates (Zones 8–10):
In warm climates where winter soil temperatures never drop below 55°F for at least 12 consecutive weeks, you must artificially provide the cold period tulips need. This is called pre-chilling or forcing.
- Place dry bulbs (not in soil) in a paper bag or mesh bag — never plastic, which traps moisture and causes rot.
- Store in a refrigerator at 35–45°F (2–7°C) for a minimum of 12–16 weeks.
- Keep away from ethylene-producing fruits like apples and bananas, which emit a gas that destroys the flower embryo inside the bulb.
- Plant pre-chilled bulbs directly into the ground or containers in December through January.
Visit for more queries Like How to Calculate Mulank
5. Where to Plant Tulip Bulbs — Location, Sunlight & Soil Requirements
Sunlight Requirements:
- Full sun is ideal: Tulips need a minimum of 6 hours of direct sunlight per day for the strongest stems and largest flowers.
- Partial shade is tolerable: Tulips can manage with 4–6 hours of sun but may produce slightly shorter, weaker stems and smaller blooms.
- Avoid deep shade: Less than 4 hours of sunlight will result in weak, leggy growth and few to no blooms.
- Note on deciduous trees: Planting tulips under deciduous trees works well because the trees have no leaves in early spring when tulips are blooming — plenty of light reaches the bulbs.
Soil Requirements:
- Well-draining soil is non-negotiable: Tulip bulbs are extremely susceptible to fungal rot if they sit in waterlogged soil. Standing water is the number one killer of tulip bulbs.
- Ideal soil pH: 6.0 to 7.0 (slightly acidic to neutral). Test your soil with an inexpensive pH test kit.
- Soil texture: Sandy loam or loamy soil is best. Heavy clay soil must be amended before planting.
- How to improve clay soil: Mix 3–4 inches of coarse sand and organic compost into the top 10–12 inches of soil before planting.
- How to improve sandy soil: Add compost or aged manure to improve nutrient retention and moisture holding capacity.
Best Planting Locations:
- South-facing or west-facing garden beds (maximum sun exposure in the Northern Hemisphere)
- Raised garden beds (excellent drainage, easy to control soil quality)
- Slopes or hillsides (natural drainage prevents waterlogging)
- Containers and pots on patios or balconies
- Rock gardens (especially for species tulips)
- Borders and edges of pathways
6. How to Plant Tulip Bulbs Step-by-Step — The Complete Planting Guide
What You Will Need:
- High-quality tulip bulbs (look for firm, plump bulbs at least 12 cm in circumference)
- Bulb planter, hand trowel, or garden dibber
- Well-draining garden soil or quality potting mix
- Organic compost or bulb-specific fertilizer
- Watering can or garden hose
- Mulch (straw, wood chips, or shredded leaves) — optional but recommended
- Chicken wire or hardware cloth (optional, for pest protection)
Step 1 — Choose High-Quality Bulbs
The size and quality of the bulb you plant directly determines the size and quality of the flower you get. This is not an area to compromise on.
- Choose bulbs that are firm and solid throughout — squeeze them gently. A healthy bulb has no give; a rotting bulb will feel soft or hollow.
- For tulips, look for bulbs with a circumference of 12 cm or larger. Top-size bulbs (also called DN-12 or DN-14) produce the biggest, tallest flowers.
- Check for mold, dark spots, cuts, or signs of pest damage. Minor surface blemishes on the tunic (papery skin) are fine — the tunic is not critical to the bulb’s health.
- Source your bulbs from reputable suppliers, local garden centers, or specialty bulb farms. Supermarket bulbs are often of lower quality and have been stored improperly.
Step 2 — Prepare the Planting Area
- Remove all weeds, rocks, and debris from the planting area.
- Loosen the soil to a depth of 12–15 inches using a garden fork or spade.
- If your soil is heavy clay or compacted, work in 3–4 inches of coarse sand and 3 inches of organic compost.
- If you want to add fertilizer at planting time, mix a slow-release bulb fertilizer (high in phosphorus, such as 5-10-5 or bone meal) into the bottom of the planting hole — never directly on top of the bulb, which causes root burn.
- Rake the surface smooth and level.
Step 3 — Dig the Planting Holes to the Correct Depth
Planting depth is critical. Too shallow and the bulbs freeze, heave out of the ground, or produce floppy stems. Too deep and they may struggle to emerge or rot in cold, wet soil.
| Bulb Size | Planting Depth | Spacing (Landscape) | Spacing (Cut Flower / Dense) |
| Large (DN-12 or bigger) | 6–8 inches (15–20 cm) | 4–6 inches apart | 1–2 inches apart |
| Medium (DN-10 to DN-12) | 5–6 inches (12–15 cm) | 4–5 inches apart | 1–2 inches apart |
| Small / Species tulips | 4–5 inches (10–12 cm) | 3–4 inches apart | 1–2 inches apart |
| General rule of thumb | 3x the height of the bulb | N/A | N/A |
Step 4 — Place the Bulbs Correctly
- Always plant with the pointed end (tip) facing UP. This is where the stem and flower emerge.
- The flat, slightly concave bottom (basal plate) faces DOWN — this is where roots grow.
- If a bulb has no obvious point (common in species tulips), look for the flat bottom and plant with the rounder side up.
- For landscape planting: space bulbs 4–6 inches apart for natural-looking clusters. Plant in odd-numbered groups (3, 5, 7, or more) for the most natural aesthetic.
- For cut flower production: pack bulbs tightly together like eggs in a carton — about 1–2 inches apart — to encourage long, straight stems.
- For container planting: pack tightly, up to 15 bulbs in a 12-inch pot and 20–25 in a 16-inch pot.
Step 5 — Cover and Water
- Backfill the holes with soil, pressing gently to eliminate large air pockets without compacting the soil too tightly.
- Water thoroughly after planting — this settles the soil, eliminates air pockets, and triggers the rooting process.
- After the initial watering, do not water again until spring growth begins, unless you are in an unusually dry climate.
- Optional: Apply a 2–3 inch layer of mulch (straw, shredded leaves, or wood chips) to regulate soil temperature, conserve moisture, and discourage early sprouting during warm autumn spells.
7. How to Plant Tulip Bulbs in Pots and Containers
Container planting is an excellent option for gardeners with small spaces, patios, balconies, or heavy clay soils. It also gives you more control over growing conditions.
Choosing the Right Container:
- Minimum depth: 12 inches (30 cm) to allow for 6–8 inches of planting depth plus drainage layer.
- Minimum diameter: 10–12 inches for a decent display. Larger is always better.
- Drainage holes are mandatory: Without drainage holes, bulbs will rot. Never use a container without holes.
- Material: Clay/terracotta, plastic, wood, and fiberglass all work. Terra cotta is porous and dries faster — ideal for wet climates. In very cold climates, pots may crack if left outdoors — use frost-resistant containers.
Potting Mix for Containers:
- Use a high-quality, pre-mixed potting mix — never straight garden soil, which compacts in containers and prevents drainage.
- For extra drainage, mix 20–30% coarse perlite or coarse sand into the potting mix.
- Add a slow-release granular fertilizer to the potting mix before planting.
Winter Storage for Container Tulips:
- In zones 4–7: Leave containers outdoors in a sheltered, frost-protected spot (against a house wall, under an overhang). Avoid direct heavy rain which saturates soil.
- In zones 3 and colder: Move containers into an unheated garage, shed, or basement where temperatures stay between 28–40°F (-2 to 4°C). Bulbs need cold but not prolonged severe freezing.
- Do not bring pots into a heated space — tulips need consistent cold to bloom properly.
- Check monthly for moisture — if soil is very dry, give a small amount of water.
8. Tulip Varieties — Which Type Should You Plant?
There are over 3,000 registered tulip cultivars divided into 15 official classification groups by the Royal General Bulb Growers Association (KAVB) of the Netherlands. Here are the most popular groups for home gardeners:
| Tulip Type | Bloom Time | Height | Best For | Perennial Potential |
| Single Early | Early spring (March–April) | 10–16 inches | Containers, borders | Low |
| Double Early (Peony) | Early spring (March–April) | 10–14 inches | Formal displays, pots | Low |
| Triumph | Mid-spring (April) | 18–24 inches | Landscape, cut flowers | Moderate |
| Darwin Hybrid | Mid-spring (April) | 22–28 inches | Best cut flower type | High |
| Single Late | Late spring (April–May) | 20–30 inches | Tall borders, cutting garden | Low |
| Parrot | Late spring (April–May) | 14–22 inches | Artistic displays, focal points | Low |
| Fringed (Crispa) | Mid to late spring | 16–24 inches | Ornamental, mixed beds | Low |
| Lily-Flowered | Mid spring (April) | 18–24 inches | Elegant borders | Moderate |
| Viridiflora (Green) | Late spring | 16–20 inches | Unique color combinations | Low |
| Species / Botanical | Early spring (March) | 4–12 inches | Rock gardens, naturalizing | High |
9. Landscape Tulips vs. Cut Flower Tulips — Key Differences
Many gardeners do not realize that growing tulips for your garden landscape and growing them specifically as cut flowers are fundamentally different in approach. Here is a clear side-by-side comparison:
| Factor | Landscape / Garden Tulips | Cut Flower Tulips |
| Primary goal | Look beautiful outdoors in beds | Produce long stems for vase arrangements |
| Bulb spacing | 4–6 inches apart | 1–2 inches apart (packed like eggs) |
| Bulb treatment | Perennial attempt (replace every 2–3 yrs) | Annual — replaced every season |
| Harvest method | Leave growing in ground | Pull entire plant, bulb and all, before blooms open |
| Best varieties | Darwin Hybrid, Triumph, Emperor | Specific cut flower varieties, any tall hybrid |
| Stem length needed | Not a priority | Minimum 12–16 inches for vase use |
| After harvest | Allow foliage to die back naturally | Discard bulb — compost it |
| Bloom timing | Allow to open fully outdoors | Harvest before blooms open for maximum vase life |
| Vase life | N/A | 7–10 days when harvested in bud stage |
| Planting method | Individual holes or bulb planter | Trench method or temporary raised bed method |
10. How to Water and Fertilize Tulip Bulbs
Watering Schedule:
| Growth Stage | Watering Frequency | Notes |
| At planting (fall) | Once, thoroughly | Settles soil, starts rooting — then stop |
| Winter dormancy | Rarely / only if very dry | Natural rainfall is usually sufficient |
| Early spring (leaves emerging) | Once per week if no rain | Light moisture only — never waterlog |
| Blooming period | Every 3–5 days if dry | Consistent moisture improves bloom size |
| Post-bloom (foliage ripening) | Reduce significantly | Allow soil to dry as foliage yellows |
| Full dormancy (summer) | None | Bulbs need dry conditions to rest |
Fertilizing Guide:
- At planting: Mix bone meal or a low-nitrogen, high-phosphorus bulb fertilizer (5-10-10 or 3-9-6) into the soil below the bulb. Phosphorus promotes strong root development.
- In early spring: Apply a balanced, slow-release fertilizer (10-10-10) when leaves first appear above the soil surface.
- After blooming: Apply a phosphorus and potassium-rich fertilizer to help the bulb store energy for next year. This is critical for perennial species and Darwin Hybrid varieties.
- Avoid high-nitrogen fertilizers: Nitrogen promotes lush leaf growth at the expense of flowers and can make bulbs more susceptible to fungal disease.
- Never apply fertilizer directly on top of bulbs: Always mix it into surrounding soil to prevent root and bulb burn.
11. 10 Most Common Tulip Planting Mistakes and How to Avoid Them
- Planting in poorly draining soil: The single biggest mistake. Waterlogged soil causes fungal rot. Always ensure drainage or build raised beds.
- Planting too shallow: Shallow planting leads to frost damage, heaving, and floppy stems. Follow the 3x depth rule — minimum 6 inches for most tulips.
- Planting too early (warm soil): Warm soil triggers premature growth that gets killed by winter. Wait until soil cools to 50°F or below.
- Planting upside down: Always check for the pointed tip (faces up) and the flat basal plate (faces down). When in doubt, plant on its side — it will self-correct.
- Storing bulbs near fruit: Ethylene gas from apples, pears, and bananas kills the flower embryo inside the bulb. Never store tulip bulbs in the refrigerator with fresh fruit.
- Cutting foliage too early: Leaves must stay green and intact after blooming — they are the factory that replenishes the bulb’s energy reserves. Wait until leaves are fully yellow before cutting.
- Over-watering after planting: One thorough watering at planting time is sufficient. Over-watering in fall and winter is a leading cause of bulb rot.
- Using low-quality or undersized bulbs: Small bulbs produce small flowers or no flowers at all. Always invest in top-size (DN-12+) bulbs from reputable sources.
- Planting in deep shade: Tulips need at least 4–6 hours of direct sun. Full shade produces weak, non-flowering plants.
- Expecting all tulips to perennialize: Most hybrid tulips decline after the first year. Only Darwin Hybrids, Triumph, and Species tulips have reasonable perennial potential. Plan to replace most varieties annually for best results.
12. Tulip Bulb Pests, Diseases & Problems — Prevention and Solutions
| Problem | Cause | Symptoms | Solution |
| Bulb Rot | Fusarium fungus or waterlogging | Soft, mushy bulb, failure to sprout | Improve drainage, avoid overwatering, choose disease-resistant varieties |
| Tulip Fire (Botrytis) | Botrytis tulipae fungus | Brown spots on leaves and petals, gray mold | Remove infected plants immediately, avoid overhead watering, improve air circulation |
| Squirrel/Chipmunk damage | Rodents dig up and eat bulbs | Missing bulbs, disturbed soil | Line planting area with chicken wire hardware cloth or use bulb cages |
| Vole damage | Voles tunnel underground and eat bulbs | Bulbs disappear, plants die mid-season | Use wire mesh baskets, plant in hardware cloth-lined beds |
| Deer browsing | Deer eat tulip flowers and foliage | Sheared-off stems and buds | Deer repellent spray, tall fencing, or plant near daffodils (which deer avoid) |
| Aphids | Sap-sucking insects | Distorted leaves, sticky residue | Spray with insecticidal soap or neem oil |
| Viruses (Tulip Breaking Virus) | Aphid-transmitted virus | Striped or ‘broken’ color patterns on petals | Remove and destroy infected plants, control aphids |
| No blooms (blindness) | Overcrowding, too warm, bulb exhaustion | Leaves appear but no flower stalks | Replant fresh bulbs, ensure proper depth, improve fertilizing |
13. What to Do After Tulip Bulbs Bloom — Post-Bloom Care
What you do after tulips bloom is just as important as what you do before they bloom. Proper post-bloom care determines whether your tulips return next year — and how well they perform when they do.
Immediate Post-Bloom Care (Deadheading):
- Deadhead spent flowers immediately after petals drop: Remove the faded flower head by cutting the stem at its base. Leaving the seed pod on the plant diverts energy from the bulb into seed production.
- Do NOT cut the foliage at this time: The leaves are still actively photosynthesizing and transporting nutrients back to the bulb for storage.
- Leave all leaves intact until they have turned fully yellow or brown — this typically takes 6–8 weeks after blooming.
Storing Tulip Bulbs for the Next Season (Optional):
In most climates, tulip bulbs can be left in the ground. However, in areas with hot, wet summers, or if you want to reclaim garden space for summer annuals, you may choose to dig and store them.
- After foliage has yellowed completely, carefully dig bulbs with a garden fork — work from 6 inches away from the planting spot to avoid spearing bulbs.
- Gently brush off excess soil. Do not wash bulbs with water.
- Inspect each bulb: Discard any that are soft, moldy, or damaged. Only store firm, healthy bulbs.
- Allow bulbs to air-dry in a shaded, well-ventilated spot for 2–3 weeks.
- Store in a mesh bag, paper bag, or open wooden crate — never in sealed plastic — in a cool, dry, dark location (40–55°F / 4–13°C) with good airflow.
- Replant in fall.
Perennial vs Annual Treatment — A Practical Decision Guide:
| If Your Tulip Is… | Recommended Approach | Expected Result |
| Darwin Hybrid variety | Leave in ground, feed after bloom | May rebloom for 3–5 years with declining vigor |
| Species / Botanical tulip | Leave in ground permanently | Naturalizes and spreads over time |
| Triumph variety | Leave in ground, may rebloom 1–2 more years | Moderate return rate |
| Standard hybrid (most types) | Treat as annual, replace bulbs each fall | Best display results year after year |
| Any tulip in wet climate | Dig and dry store, replant in fall | Prevents summer rot |
14. Advanced Technique: Lasagna Planting for Continuous Blooms
Lasagna planting (also called layered planting) is a method of layering different bulb varieties at different depths within the same container or garden bed to create a continuous succession of blooms from early to late spring.
How Lasagna Planting Works:
- Select bulbs with different bloom times: early-season (crocuses, early single tulips), mid-season (Darwin Hybrids, Triumph), and late-season (parrot, single late tulips).
- Start with the deepest-planting bulbs at the bottom layer: large tulip bulbs at 8 inches deep.
- Add a thin layer of soil (2–3 inches), then place the next size of bulb — such as daffodils or mid-season tulips at 5–6 inches.
- Add another soil layer and top with small, shallow-planting bulbs such as crocuses or grape hyacinths at 3–4 inches.
- Cover with soil, mulch, and water thoroughly.
Result: As the season progresses from early to late spring, each layer wakes up and blooms in succession, giving you 6–10 weeks of continuous flowering from a single container or bed.
15. Best Companion Plants to Grow with Tulip Bulbs
Strategic companion planting enhances the beauty of tulips, deters pests, fills gaps between plants, and extends the visual interest of your garden.
- Daffodils (Narcissus): Deer and squirrels avoid daffodils because they are toxic. Interplanting tulips with daffodils creates a natural pest-deterrent barrier. They also have similar growing requirements.
- Alliums (Ornamental Onions): Bloom slightly later than tulips, extending the color show. Their globe-shaped flowers contrast beautifully with tulip cup shapes. Also deter aphids naturally.
- Forget-me-nots (Myosotis): Low-growing blue flowers fill the gaps between tulip stems and hide the bare soil and yellowing foliage as tulips fade.
- Pansies and Violas: Cold-hardy annuals that bloom simultaneously with early tulips, creating a multi-layered display at different heights.
- Hostas: Their large leaves emerge just as tulip foliage is dying back, naturally masking the yellowing leaves.
- Grape Hyacinths (Muscari): Plant around and between tulips for a blue-purple carpet that beautifully frames red and yellow tulips.
- Creeping Phlox: Ground-hugging perennial that provides early color and serves as a living mulch around bulbs.
Frequently Asked Questions (FAQs) — How to Plant Tulip Bulbs
Q1: How deep should I plant tulip bulbs?
Plant tulip bulbs at a depth of 6–8 inches (15–20 cm) measured from the base of the bulb to the soil surface. The general rule is to plant at a depth equal to three times the height of the bulb. In sandy or loose soil, plant slightly deeper; in heavier clay soils, plant at the minimum depth to avoid waterlogging issues.
Q2: Can I plant tulip bulbs in spring?
No. Tulip bulbs must be planted in fall (autumn) — typically September through November depending on your climate zone. They require a mandatory cold dormancy period of 12–16 weeks with soil temperatures below 50°F (10°C) in order to bloom. Spring-planted bulbs will not bloom. If you missed the fall planting window, store bulbs in the refrigerator and plant them as early as possible in late winter or very early spring, though results will be reduced.
Q3: How many tulip bulbs should I plant together for the best display?
For the most impactful visual effect, plant in clusters of at least 10–15 bulbs of the same variety together. Isolated single bulbs or small groups of 3 often look thin and underwhelming. For large landscape beds, plant 25 or more bulbs of a single variety in sweeping drifts. For containers, pack as many bulbs as will fit without touching each other.
Q4: Do tulip bulbs multiply and come back every year?
It depends on the variety. Most hybrid tulips are best treated as annuals because they decline significantly in size and bloom quality after the first year. However, Darwin Hybrid tulips, Triumph tulips, and all species (botanical) tulips have good to excellent perennial potential and will naturalize and multiply over time if grown in the right conditions — well-draining soil, adequate sun, and proper post-bloom care including allowing foliage to die back naturally.
Q5: Why are my tulips not blooming?
The most common reasons for tulip failure to bloom include: planting at the wrong time (too warm), planting too shallow, waterlogged soil causing bulb rot, insufficient chilling period, cutting back foliage too soon in previous years (depleting bulb energy reserves), overcrowded bulbs competing for nutrients, or simply using bulbs that are past their prime. Fresh, top-size bulbs planted at the correct depth and time in well-draining soil almost always produce flowers.
Q6: How long do tulips bloom?
An individual tulip plant blooms for approximately 1–2 weeks. The exact duration depends on the variety and weather conditions — cool spring temperatures extend bloom time significantly, while hot weather shortens it dramatically. By planting a mix of early, mid-season, and late-blooming varieties, you can extend the overall tulip display in your garden to 6–8 weeks through the spring season.
Q7: Can tulip bulbs be planted in pots and kept indoors?
Yes, with the right approach. This technique is called forcing. Plant bulbs in a pot with good drainage and quality potting mix, then place the pot in a cold location (35–45°F / 2–7°C) such as an unheated garage or refrigerator for 12–16 weeks. Once sufficient chilling is complete, bring the pot indoors to a cool, bright location. Shoots will emerge within 2–3 weeks and flowers will follow shortly after. Forced tulips are typically not re-bloomed and are composted after flowering.
Q8: What is the difference between tulip bulbs and tulip seeds?
Tulip bulbs and tulip seeds are both ways to propagate tulips, but they are vastly different in practice. Bulbs are mature, dormant plants that bloom the very next spring after planting — they are the standard method for home gardeners. Tulip seeds, by contrast, take 5–7 years of careful cultivation before producing their first flower, and the resulting plants may not resemble the parent plant. Seeds are used almost exclusively by professional breeders developing new varieties. Home gardeners should always plant bulbs, not seeds.
Q9: Are tulip bulbs toxic to pets?
Yes. Tulip bulbs and all parts of the tulip plant contain tulipalin A and tulipalin B — toxic compounds that cause varying degrees of gastrointestinal irritation in dogs, cats, and horses. The bulb contains the highest concentration of these compounds. Symptoms of ingestion include drooling, vomiting, diarrhea, lethargy, and in severe cases of large ingestion, difficulty breathing or rapid heart rate. If you suspect your pet has eaten tulip bulbs, contact your veterinarian or an emergency animal poison control hotline immediately.
Q10: Where do the best tulip bulbs in the world come from?
The Netherlands is globally recognized as the world’s leading producer and exporter of tulip bulbs, accounting for approximately 80% of the world’s supply. The Dutch bulb-growing region is centered in the provinces of Noord-Holland and Zuid-Holland, particularly around the towns of Lisse, Hillegom, and Noordwijkerhout. The unique combination of sandy, well-draining polderland soil, cool maritime climate, and centuries of breeding expertise makes the Netherlands uniquely suited to producing the highest-quality tulip bulbs in the world.
Quick Reference Summary: How to Plant Tulip Bulbs
| Factor | Specification |
| When to plant | Fall — September to November (when soil reaches 40–50°F / 4–10°C) |
| Planting depth | 6–8 inches (15–20 cm) — or 3x the height of the bulb |
| Spacing (landscape) | 4–6 inches between bulbs |
| Spacing (cut flowers) | 1–2 inches (packed tightly) |
| Orientation | Pointed end UP, flat basal plate DOWN |
| Sunlight | Full sun — minimum 6 hours direct sunlight daily |
| Soil type | Well-draining loam — pH 6.0 to 7.0 |
| Watering after planting | Once, thoroughly. Do not water again until spring |
| Mulching | 2–3 inches optional but recommended in cold climates |
| Chilling requirement | 12–16 weeks below 50°F (10°C) soil temperature |
| Fertilizer at planting | Bone meal or low-N, high-P bulb fertilizer — mixed into soil below bulb |
| Fertilizer after bloom | Balanced fertilizer to restore bulb energy for next year |
| Foliage after bloom | Leave until completely yellow — 6–8 weeks post-bloom |
| Bloom season | Spring — March to May depending on variety and zone |
| Perennial potential | Darwin Hybrid: moderate. Species: high. Most hybrids: annual |
| Toxic to pets? | Yes — all parts, especially bulbs, are toxic to dogs, cats, horses |
| Best bulb source | Netherlands-grown, top-size (DN-12 or larger), reputable supplier |
Final Thoughts: Your Complete Tulip Planting Checklist
Planting tulip bulbs is one of the most rewarding acts in gardening — a small investment of time and effort in autumn that pays back spectacularly the following spring. Success comes down to a few key principles: choose top-quality bulbs, plant at the right depth at the right time, ensure excellent soil drainage, and give your tulips the sunlight they need.
Whether you are growing a container display for a small balcony, building a cutting garden for fresh flower arrangements, or designing sweeping drifts of color across a large landscape bed, the fundamentals of tulip planting remain the same. Follow this guide and you will be rewarded with some of the most beautiful flowers spring has to offer.
Your Fall Tulip Planting Checklist:
- Choose firm, top-size tulip bulbs from a reputable source
- Check your USDA zone and determine your correct planting window
- Test and amend soil for drainage and pH before planting
- Plant at the correct depth — minimum 6 inches for most varieties
- Always plant with pointed end up and flat base down
- Water thoroughly once at planting then leave alone until spring
- Apply mulch in cold climates to protect against freeze-thaw cycles
- Plan your variety mix for early, mid, and late season succession
- After bloom: deadhead spent flowers, leave foliage to yellow naturally
- Decide whether to leave in ground or dig and store based on your climate and variety